Once you’re logged into Hyperblog, your first step is to personalize your blog using the Settings section. This is where you configure everything — your own domain, logo, theme colors, fonts, navigation, authors, SEO preferences, and more. Access it from your main dashboard:Documentation Index
Fetch the complete documentation index at: https://docs.hyperblog.io/llms.txt
Use this file to discover all available pages before exploring further.
Go to → Settings You’ll find the following key sections:
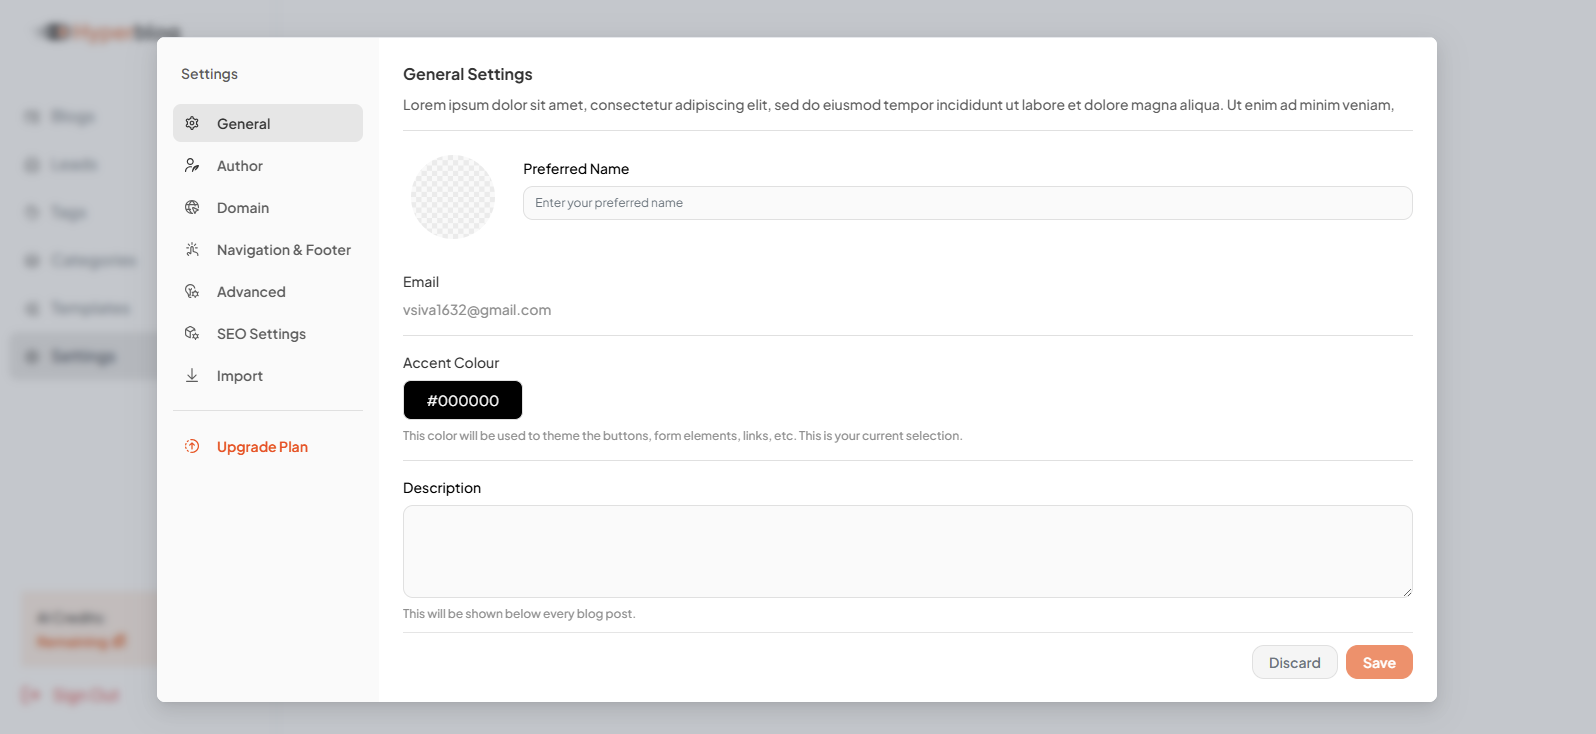
1. General Settings
Define your brand’s core identity and global preferences. You can configure:- Preferred Name: Your brand or workspace display name.
- Email: The email linked to your workspace and notifications.
- Accent Color: This color defines the overall theme — used for buttons, links, and form elements across your site.
- Site Description: A short tagline shown below each blog post.
- Timezone Selection: Controls how dates and schedules appear site-wide.
- Visibility Options: Choose whether to display the site description or include “Made with Hyperblog” branding at the footer.
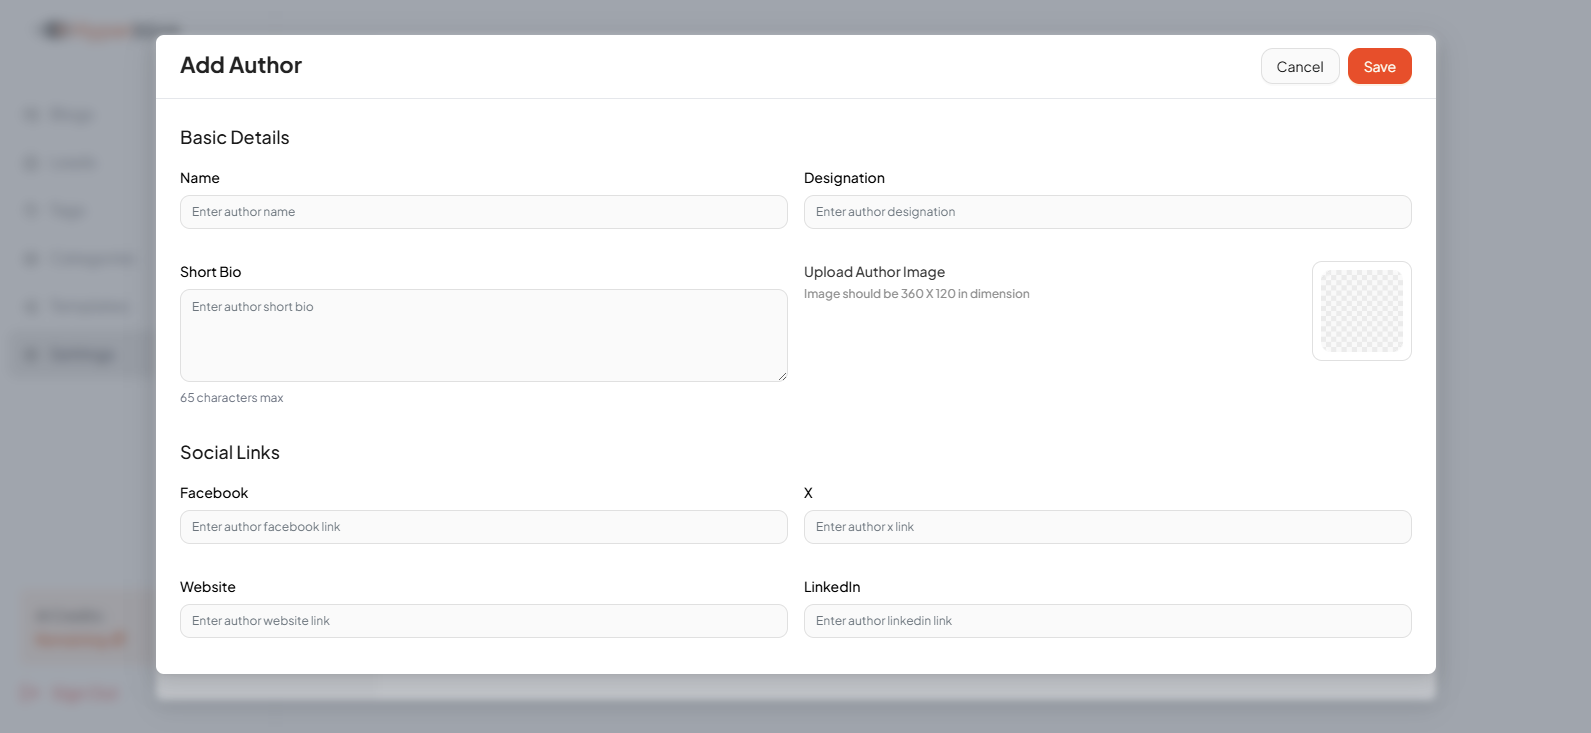
2. Author Management
Manage the people behind your content. To add an author, click “+ Add Author” and fill in:- Name
- Designation
- Short Bio (up to 65 characters)
- Upload Image (360x120px recommended)
- Social Profiles: Facebook, X (Twitter), LinkedIn, Website
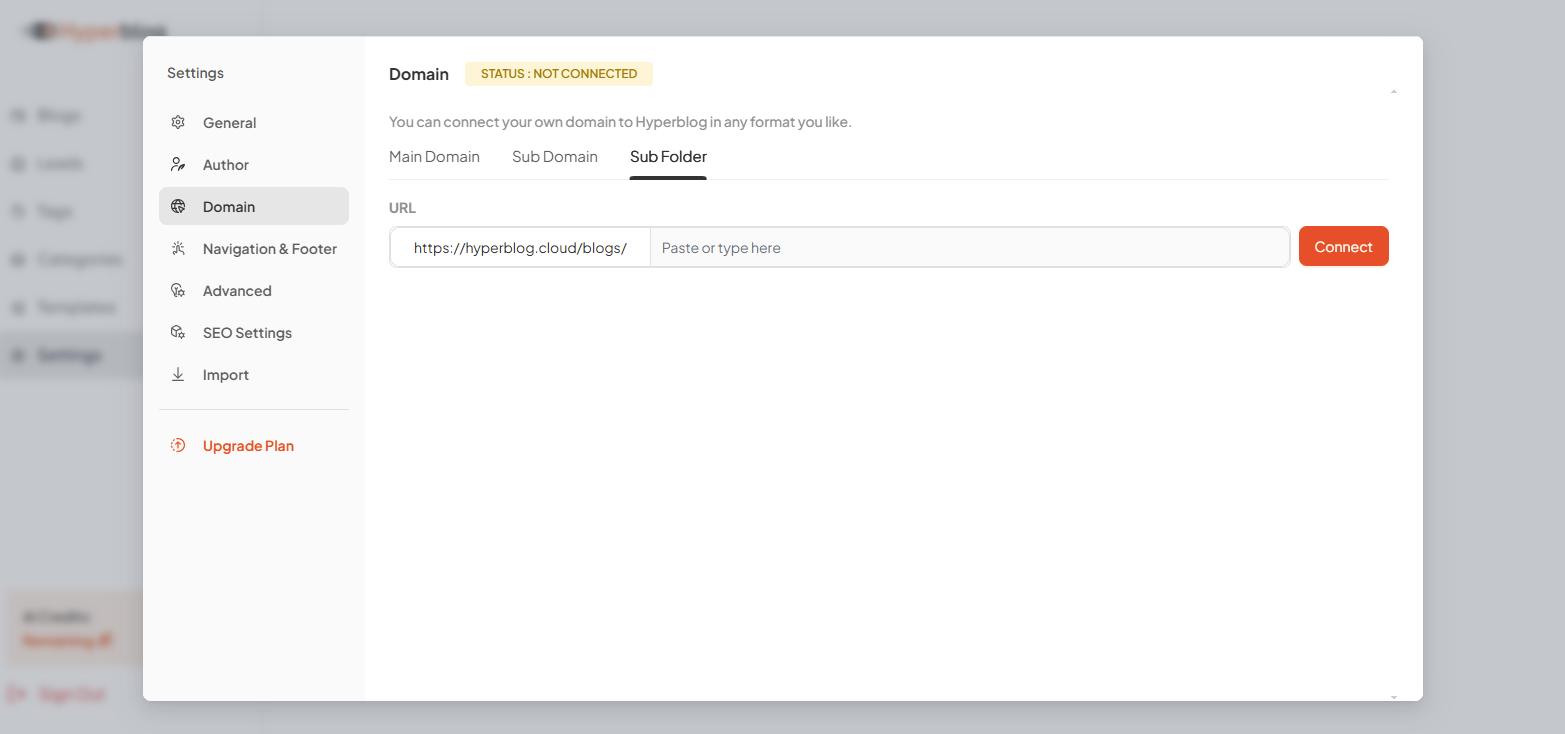
3. Domain Setup
Make your blog accessible under your brand’s domain. You can connect:- Main Domain – e.g. yourbrand.com
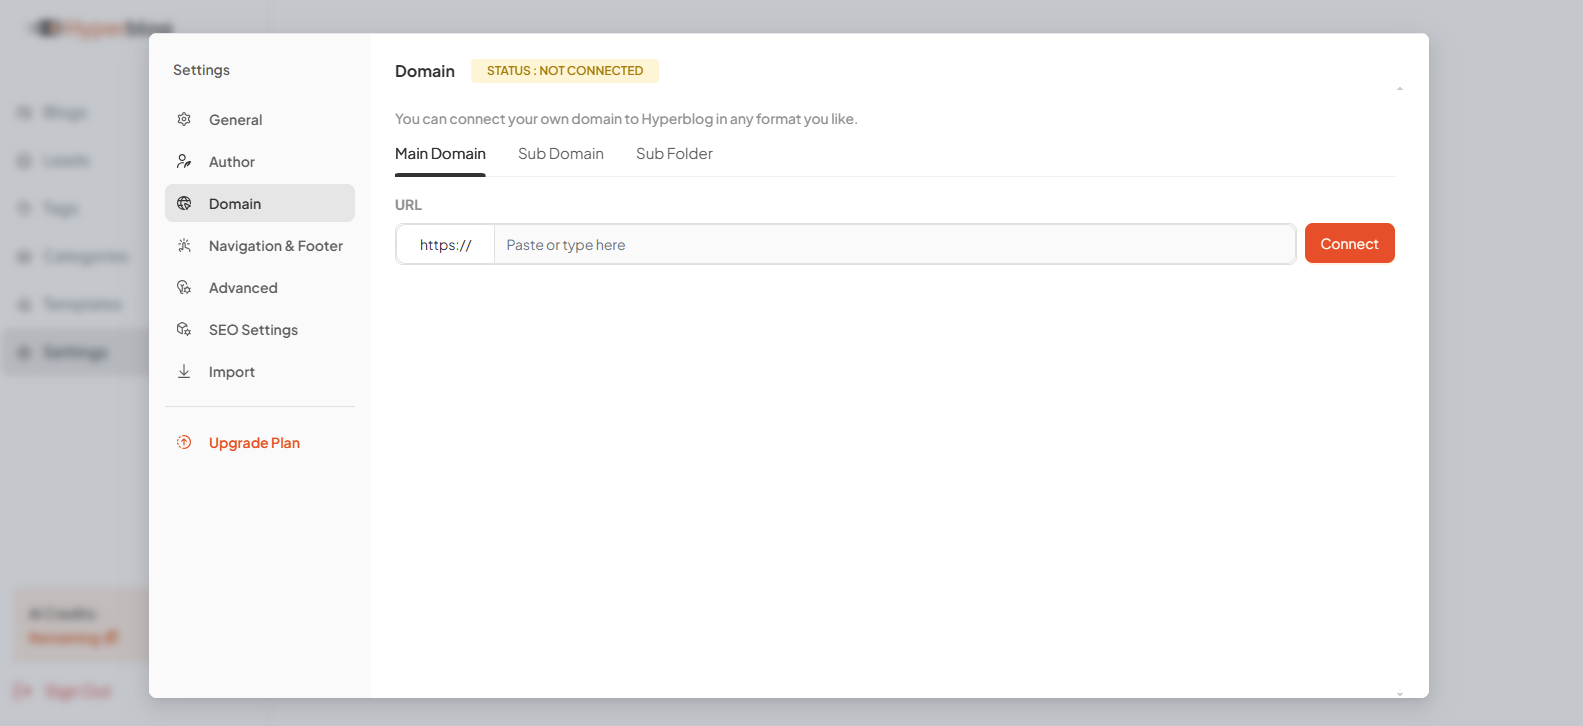
- Subdomain – e.g. blog.yourbrand.com
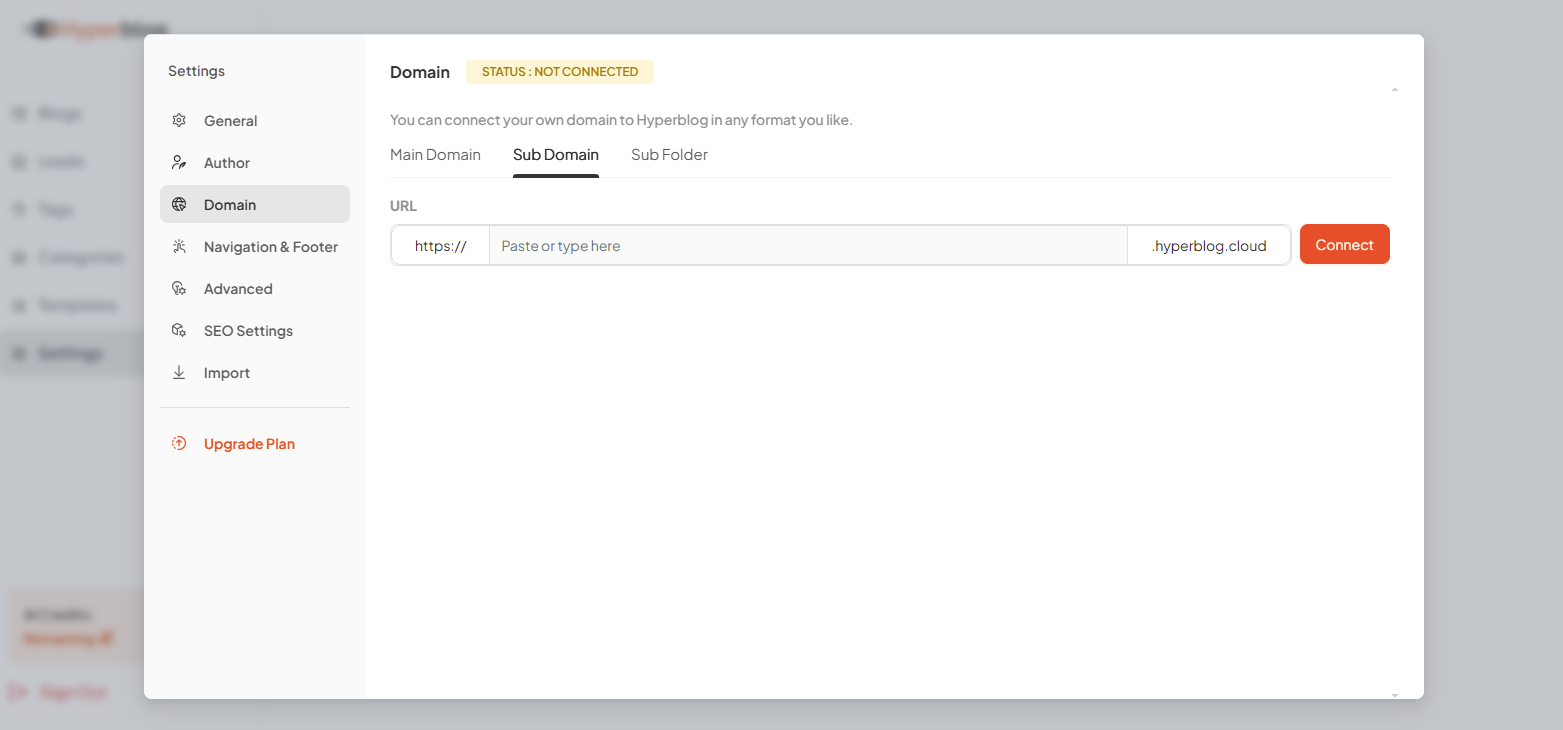
- Subfolder – e.g. yourbrand.com/blog
Next Step: Configure Your DNS / CPanel
After selecting your domain setup, you’ll need to configure your DNS settings through your hosting provider’s CPanel or domain manager. 👉 See setup guides for popular platforms:• Connect to WordPress »
• Connect to Ghost »
• Other CMS & Hosting Setups »
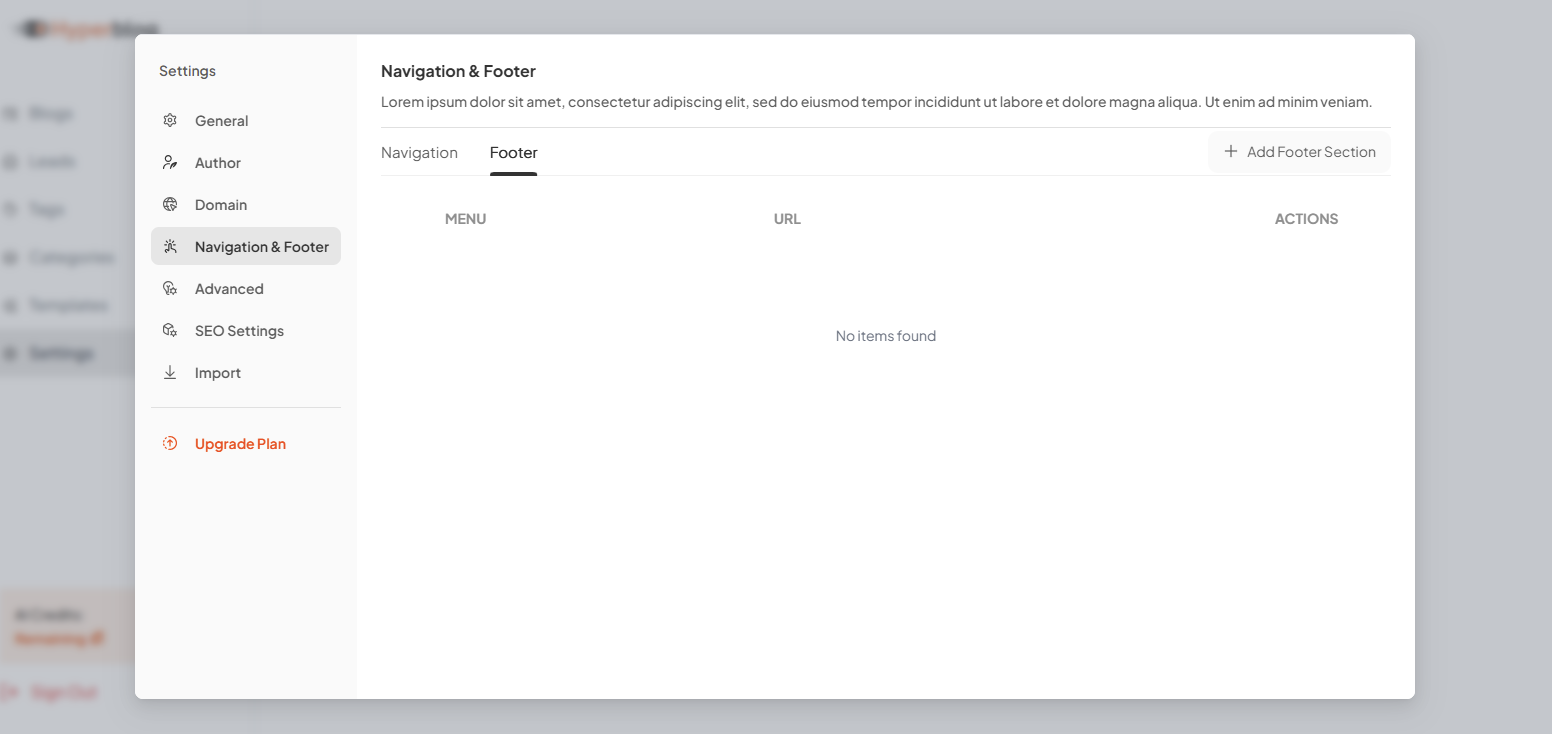
4. Navigation & Footer
Design your blog’s navigation flow and footer structure.- Navigation Menu: Add custom menu items with labels and URLs for easy user access.
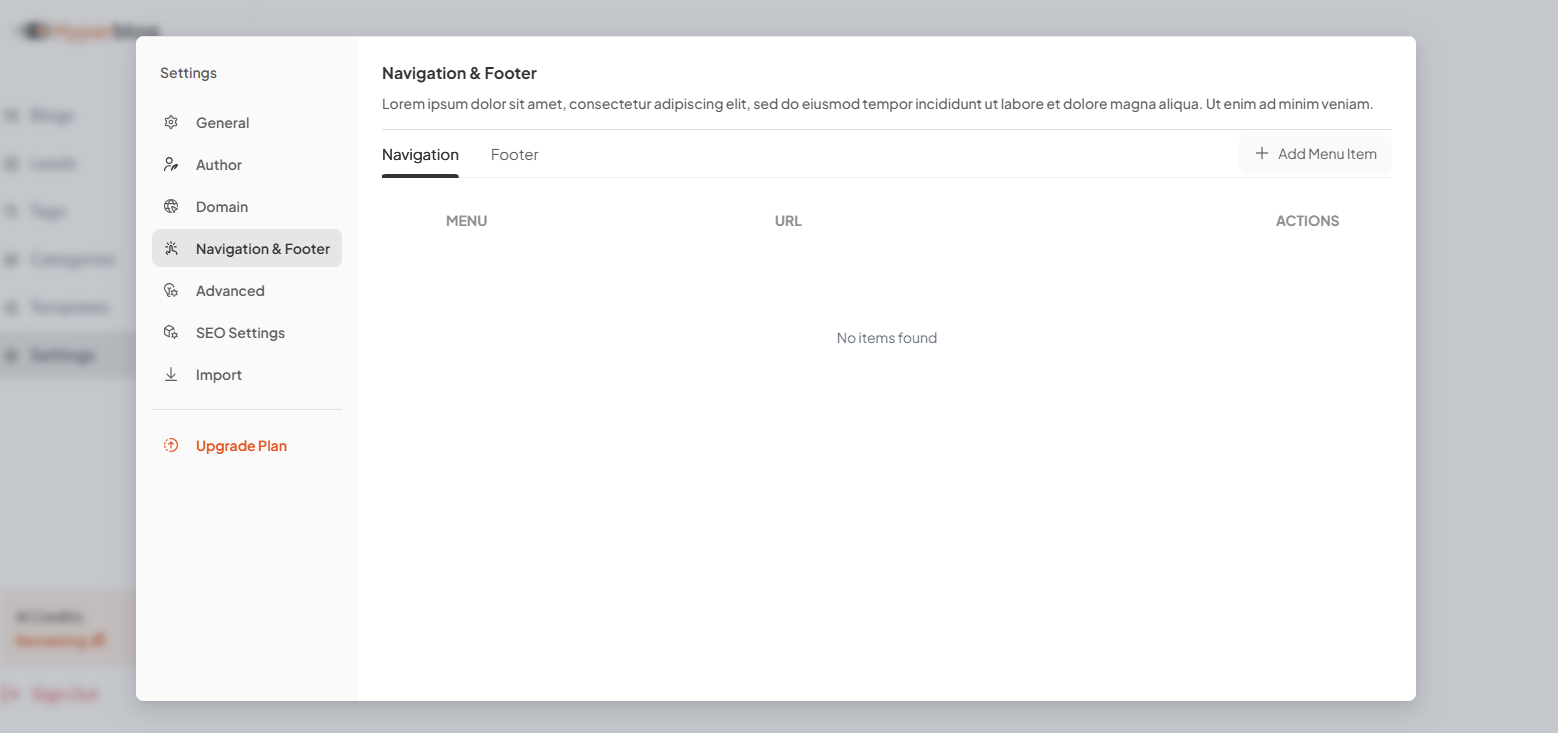
- Footer Menu: Customize footer links, such as “Privacy Policy”, “Contact”, or “Tags”.
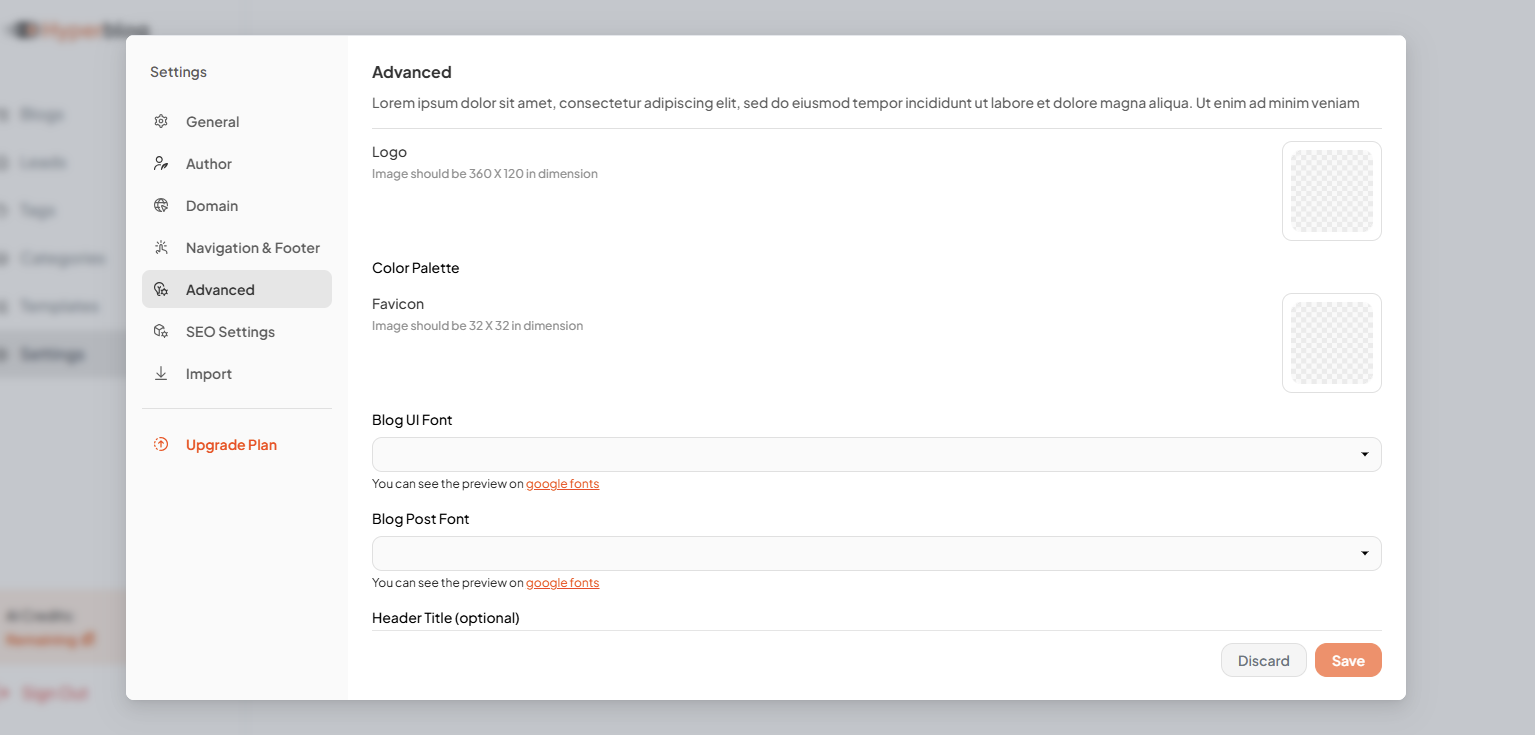
5. Advanced Branding & Layout
This section gives you deep control over design, fonts, and visual presentation. Configure the following:- Site Logo (360x120px)
- Footer Logo (360x120px)
- Favicon (32x32px)
- Primary Color Palette
- Typography: Choose Google Fonts for blog UI and post content.
- Header Elements: Optional fields for blog title, caption, and CTA button text/link.
- Categories Filter: Enable category filters on your blog listing page.
- Fixed Navigation: Keep the menu bar always visible at the top.
- Open Graph Image (1200x630px): Set a social-sharing preview image.
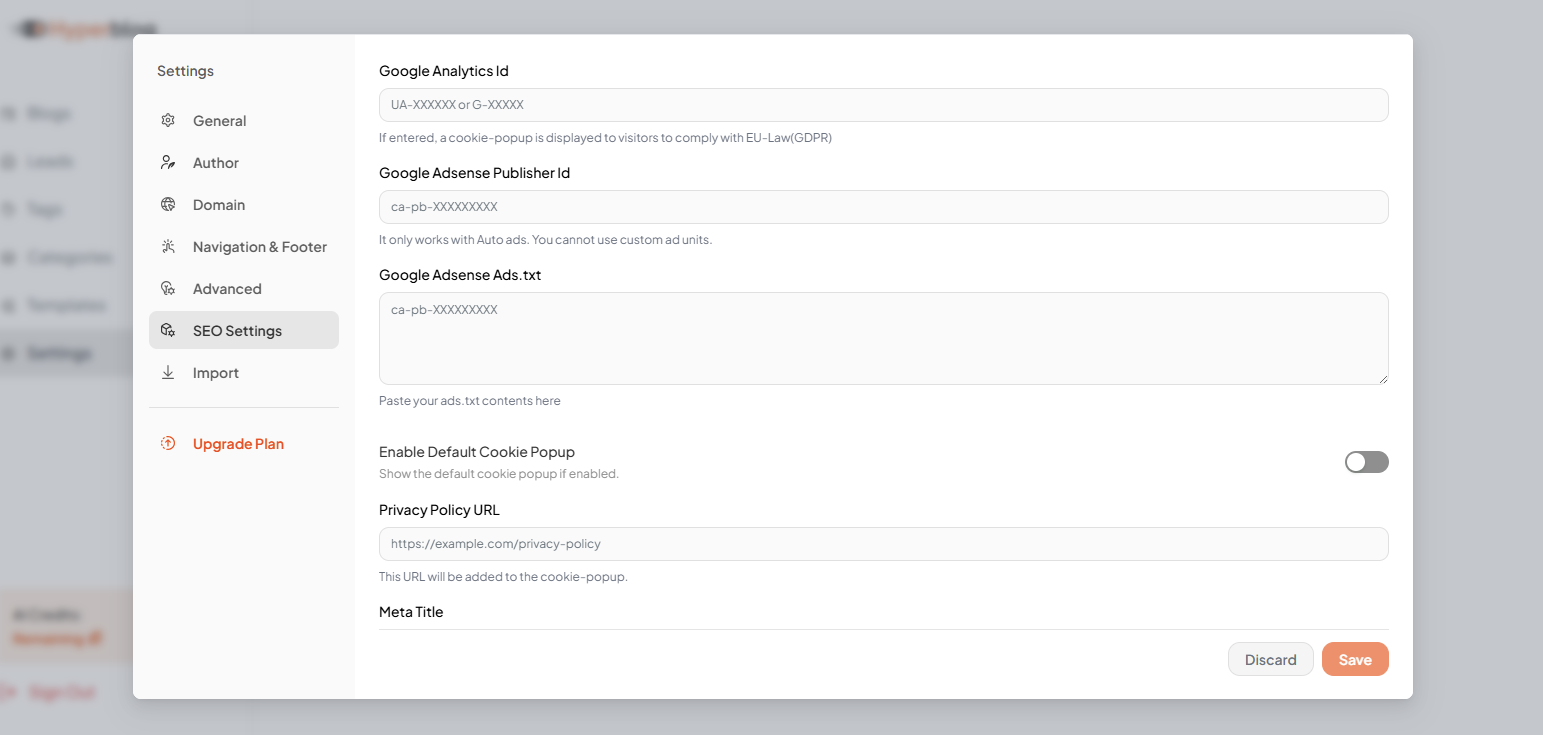
6. SEO & Analytics Settings
Maximize discoverability with built-in SEO tools and integrations. Configure:- Google Analytics ID: Enables visitor tracking and shows cookie popup for compliance.
- Google AdSense ID: Integrate ads with Auto Ads support.
- Ads.txt Support: Paste your verified ad credentials here.
- Cookie Popup: Built-in cookie consent popup with a link to your Privacy Policy.
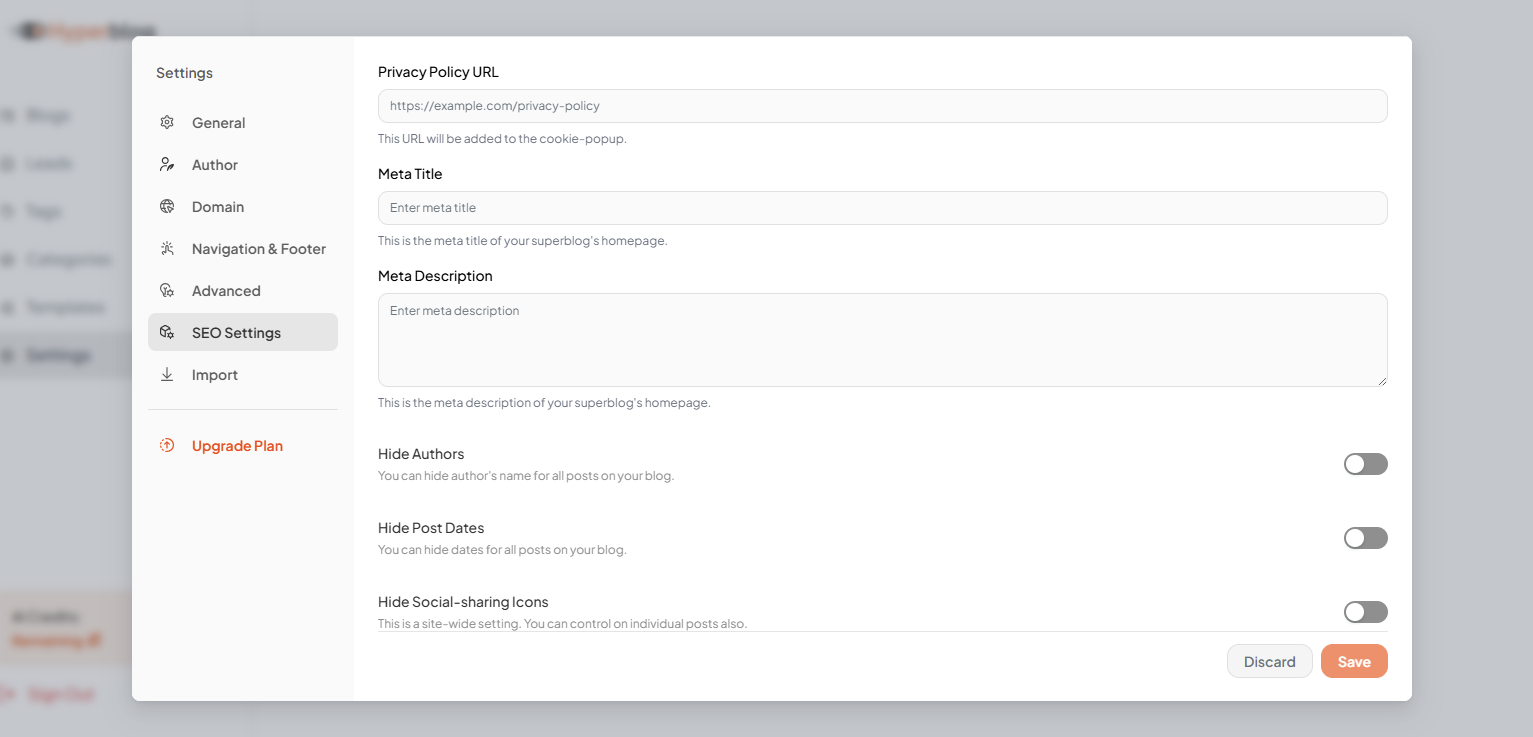
- Meta Title
- Meta Description
- Hide authors or post dates site-wide
- Enable/disable social-sharing icons
- Remove default footer items like “Search” and “Tags”
- Show or hide the homepage search bar
- Enable progress bar on blog posts during scroll
- Receive deployment email notifications
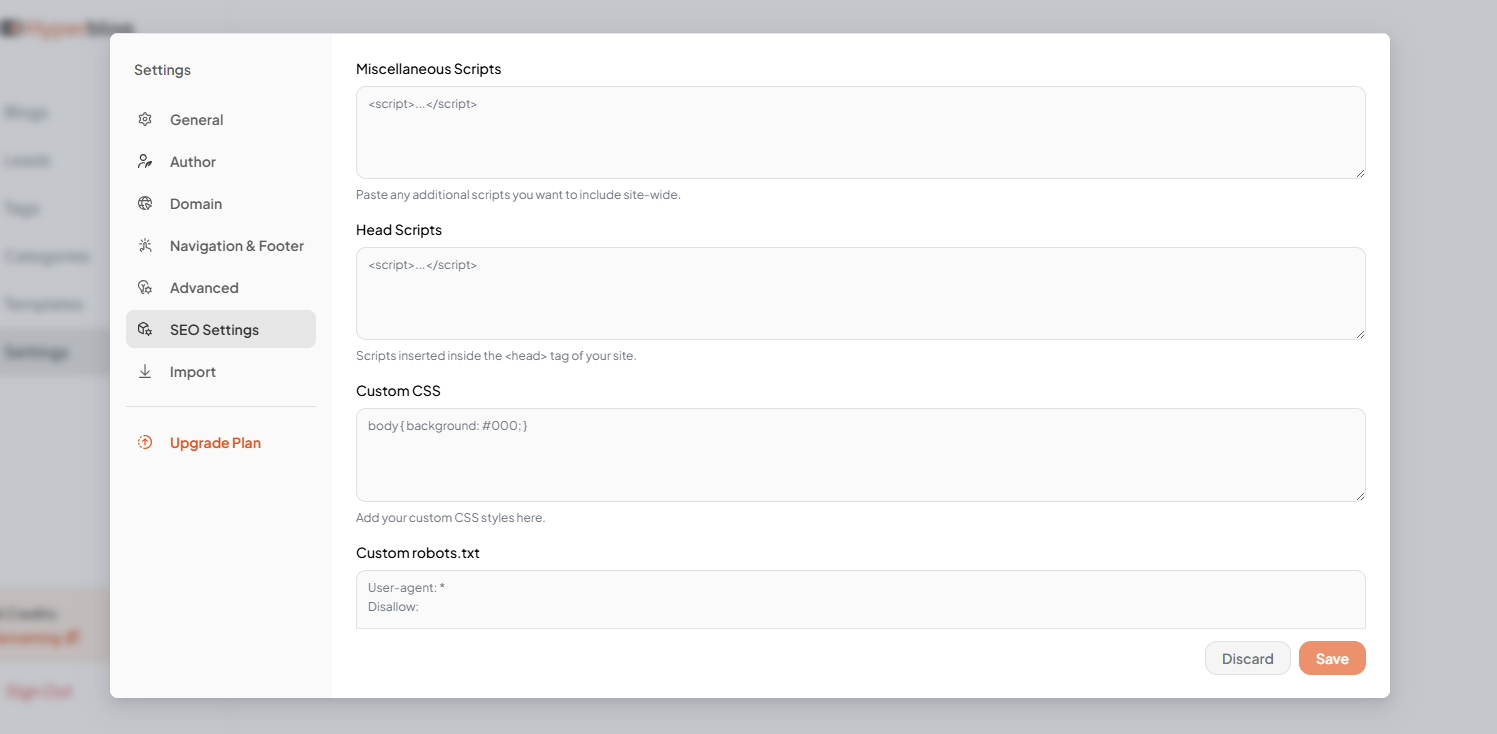
- Add custom CSS, custom robots.txt, and head scripts site-wide
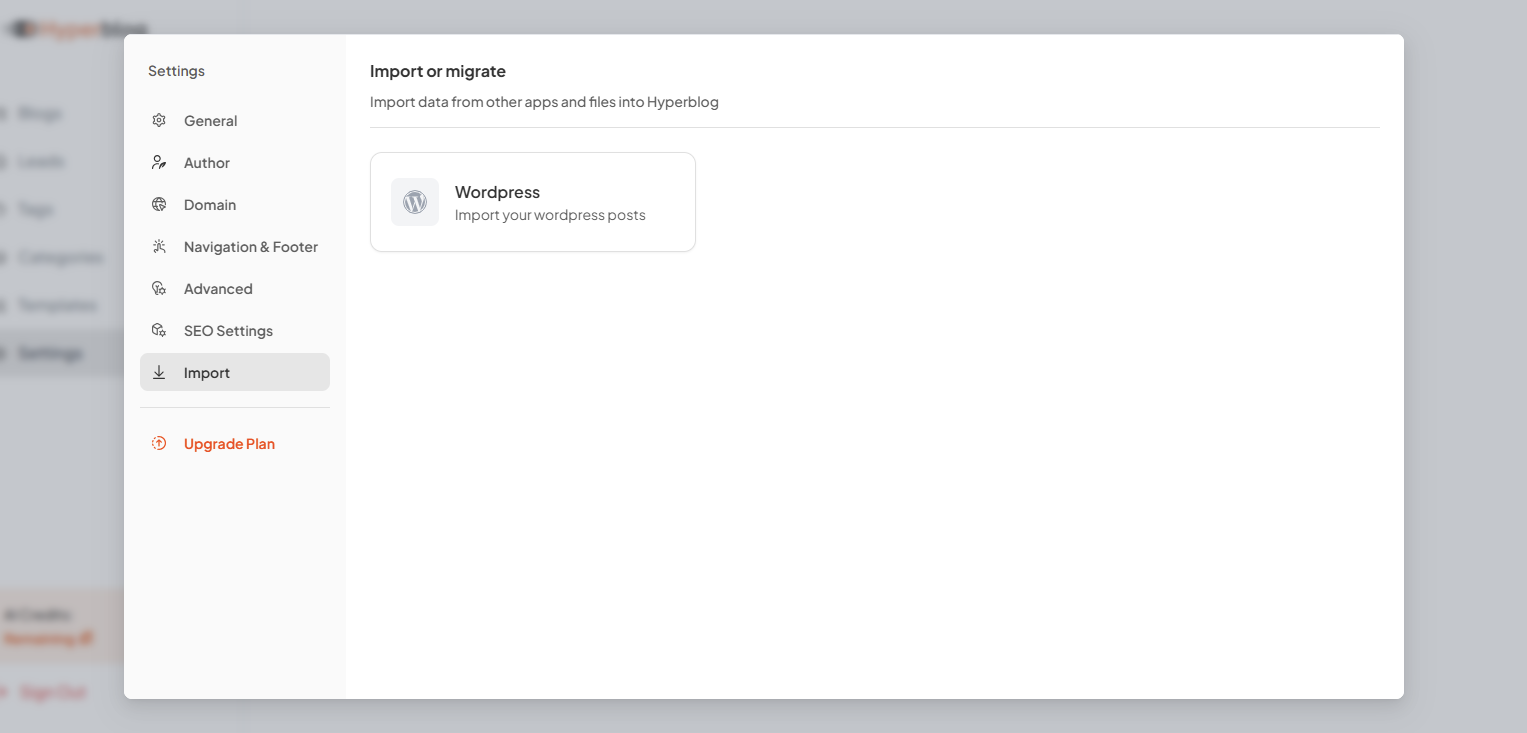
7. Import Existing Blog Content
Already have a blog on another platform? Hyperblog makes it easy to import from:- WordPress
- Ghost
- Other CMSs via XML or JSON